What are 3 ways to reduce flood damage?

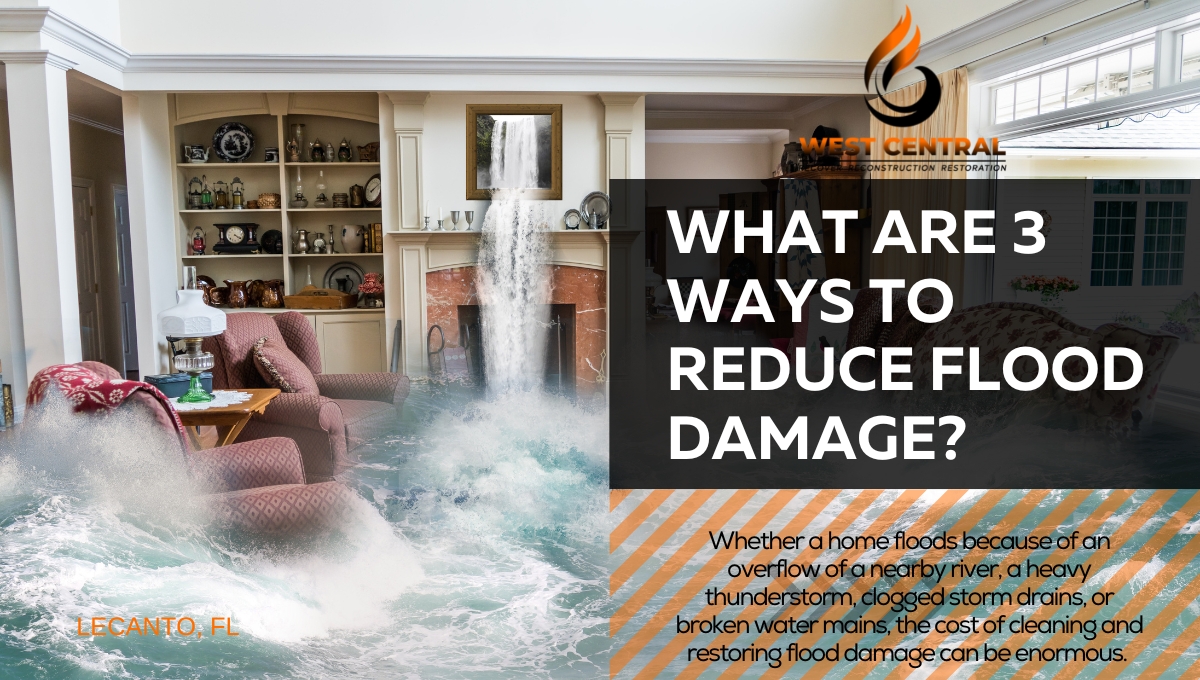
Whether a home floods because of an overflow of a nearby river, a heavy thunderstorm, clogged storm drains, or broken water mains, the cost of cleaning and restoring flood damage can be enormous. 

For instance, at least $53,000 is required to clean and restore a 2500-square-foot home that floods to just six inches. And the total cost of the flood damage restoration process can be much higher depending on the type of property damaged, extent of spread of the flood, number and value of items affected and subsequent replacement costs.

Therefore obviously it is better to take measures to prevent a home from flooding rather than to clean up and restore it after a flood.  Preventive measures also reduce potential damages should a home eventually flood.

Here are 3 best ways to reduce flood damage in your home

  1. Have your home inspected regularly

Having your home regularly inspected can promptly pick up issues that may make it vulnerable to flooding. For example, frequent inspection can reveal faults in a home’s drainage system and allow for a timely correction to prevent flooding.

With regular inspection, you’ll often find and remove debris from the gutters. You’ll also correct any leaks or gaps in the gutters that may direct water towards the home’s foundation instead of away from it. Equally, you’ll be able to make sure downspout extensions divert water far away from the foundation.

Integrity of the foundation of your home is critical in preventing flooding. So check the foundation regularly for cracks. If there are any cracks, fill them up to prevent possible water seepage into your home.  To seal larger cracks, hire a basement specialist or structural engineer.

The windows should not allow water into your home. Make sure that windows fasten firmly and when appropriate buy window well covers that close securely to prevent entry of water into the wells.

Re-grading your yard is an effective flood control measure. Look for and correct potential trouble spots in the yard, especially if drainage problems tend to occur after it rains.

Ensure that the soil within three yards from your house slopes away in order to direct water-flow away from the foundation.  Dig trenches or install drains to facilitate runoff, and plant vegetation or build a rain garden to absorb away water runoff.

  1. Install flood-control equipment

There are a number of installations that can reduce flood damage. First, you can install flood vents to keep floodwater flowing through an enclosure below your home, and to reduce water pressure from building and damaging the foundation or walls.

Second, you can install a sump pump to direct groundwater away from the building and prevent basement flooding. Since storms are associated with loss of electricity, have a backup battery to run the sump pump in case of power outage.

Third, you can install flood damage-resistant flooring in flood-prone areas, such as basements. Flooring materials like rubber, vinyl, and ceramic tiles are flood damage-resistant. For walls and ceiling, water-resistant cement board, pressure-treated wood, or concrete are appropriate.

If you are being especially thorough, you can install a backflow preventer in the main sewer line. It will minimize your home’s exposure to the main sewer backup. 

Your home’s sewer line should also be inspected by a professional to clean and unclog it and identify any blockages. Avoid putting things down your home’s pipes that could cause a clog or backup such as large food scraps or cooking grease.

Consider installing a flood alert system.  The alert system will provide an early warning in case of a flood or emergency. There are many water sensors and warning devices in the market, and even the most basic system will give the necessary early warning. Similarly, sign up for emergency alerts through the local emergency management department.

  1. Store essentials off the ground

To reduce flood damage, you need to minimize exposure of utilities, appliances, documents, and equipment to flood water. An easier way to ensure this is keeping these essentials off the ground.

Elevate your fuel tanks, washing machines, dryers, central air conditioning units, and heat pumps above the ground. If possible, locate them in the attic or higher floors.  

Keep anything that could be damaged by water off the basement—books, pictures, and electronic equipment must never be on the basement. If you have no other option, store the items in a cabinet or elsewhere above the ground.

Place valuable documents, such as birth certificates and other records in watertight containers, like a waterproof safe. And have such a safe ready as part of your emergency supply kit that you can quickly grab and take with you.  

When there are essentials that have to be on the lower floors or located outside, ensure they are placed on platforms positioned at least 1 foot above the base flood elevation. Anchor the items placed on platforms to prevent their collapse, flotation, or lateral movement.

Equally, position switches, outlets, electrical wiring, fuse boxes, and electrical service panels at least 1 foot above flood elevation levels. 

Want help with flood damage throughout Florida? Call the number +1 (352)-270-8417 to link up with skilled, knowledgeable, and experienced flood damage restoration from West Central Equipment and Restoration.

For more information on flood damage restoration, visit the site “West Central Equipment and Restoration.”

Moisture and Mold Problems: Preventing and Solving Them in Your Home

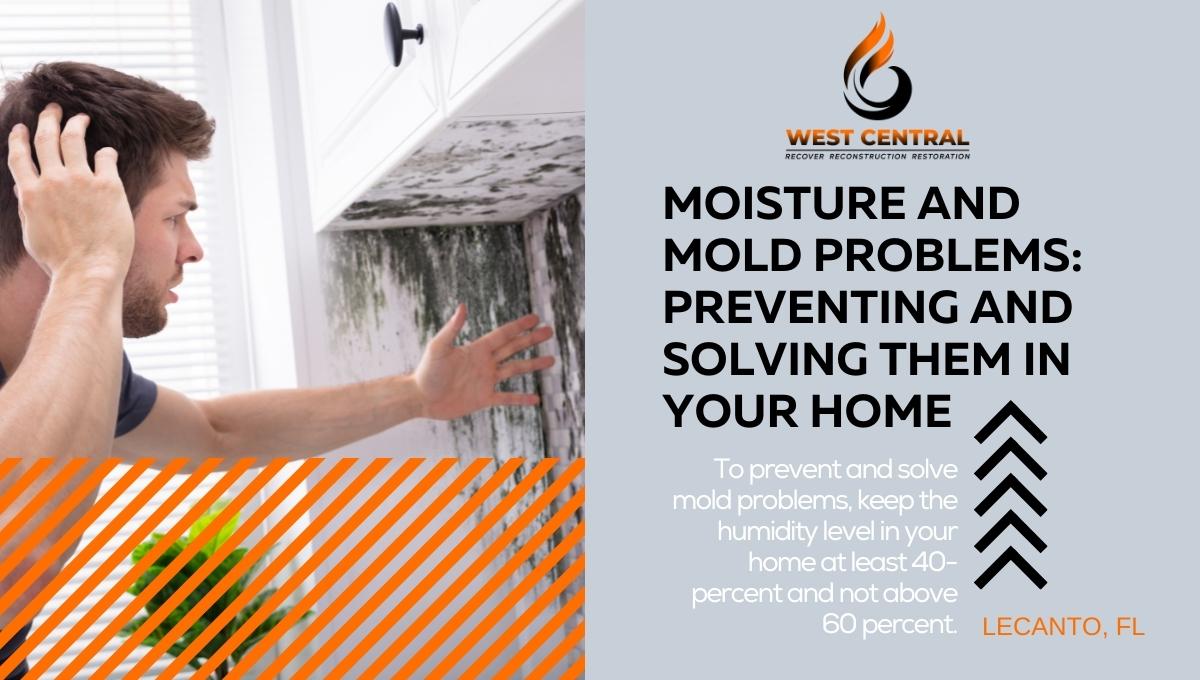
Household mold is unsightly, unhealthy and destructive. The dark, offensive patches can make your home unappealing. The tiny, irritating spores can trigger health problems, such as allergies and asthma. And the rapidly-spreading fungal growth can damage your walls, floors, ceiling, and roofs.

Because mold is found almost everywhere and can grow on nearly every substance provided there is moisture, you can prevent and solve mold problems in your home through moisture control. In fact, studies show that with humidity levels above 80-percent, there is a 50-percent chance of mold development.

To prevent and solve mold problems, keep the humidity level in your home at least 40-percent and not above 60 percent. Any humidity level below or above this range for an extended period of time can result in mold growth.

The most common sources of moisture and mold problems are:

  • Daily activities, such as bathing, showering, washing clothes, or cooking, particularly when exhaust fans are malfunctioning or not used.
  • Moisture condensation on cold surfaces.
  • Inadequate ventilation.
  • Plumbing leaks.
  • Infiltration of water from outside due to cracks or leaks in the foundation, walls, roof or floors.
  • Flooding due to weather conditions, like storm surges, heavy rainfall and snow melt.

The moisture will accumulate inside your home over time, especially if it can’t be vented out. Then, building materials get wet or damp and mold spores begin to germinate. Small growths spread quickly and colonize larger areas, resulting in a difficult-to-eliminate mold problem.

Generally, you can prevent and solve moisture and mold problems by:

  • Reducing the amount of moisture produced in your home.
  • Providing adequate ventilation, especially in moisture-prone areas.
  • Increasing heating to raise the temperature of the air and cold surfaces.
  • Insulating the building to warm up cold surfaces and keep heat inside.

More specifically, you can prevent and solve moisture and mold by focusing on the following areas.

  1. Exterior of the home/around the house
  • Slope the grade away from your building to ensure rain, irrigation water, and snow melt drain away from the house.
  • Repair plumbing leaks.
  • Use moisture-tolerant materials in areas likely to get wet, such as laundry areas, kitchen, and bathrooms.
  • Use exhaust fans and ventilation and air conditioning system to vent moisture outdoors.
  • Keep downspouts and eaves-troughs clean of debris and ensure that the outflow runs away from the house and not into neighboring foundations.
  • Run a dehumidifier in damp areas like basements or if there is moisture condensing on cold surfaces like window panes.
  • Buy a hydrometer to help you measure and control indoor humidity within the 40 to 60 percent range.
  • Clean drip pans frequently and keep drainage lines free of any obstacles.
  • Maintain standard room temperature, keeping the home warm especially during cold weather.
  1. Kitchen
  • Remove existing moisture using a kitchen range hood each time you cook. 
  • Check the range hood to ensure adequate air movement and that it vents to the outside.
  • Use exhaust fans to move moisture out of the kitchen, particularly after cleaning, washing, or even cooking. 
  • Regularly inspect your kitchen for leakages under the sinks, fridge ice makers, and other water resources.
  • Have proper ventilation in the kitchen, such as installing big fans and exhaust fans by the window on the crawl spaces.
  • Routinely empty and wash the refrigerator drip pans.
  •  Check to make sure that the kitchen gutters and other outdoor landscaping are functioning and delivering water out of your home, not inside.
  • Have a mold removal professional inspect and test cellar flooring for leakage.
  • Cover pots with a lid when cooking.
  1. Laundry
  • Avoid leaving damp clothing in the laundry basket, drier, or inside the washing machine.
  • Make sure your clothes dryer vents to the outside; and to seal joints in the dryer duct with foil tape to prevent moisture seepage into the surrounding.
  • Clean the lint tray each time you use the dryer.
  • Ensure nothing stands in front of the vent and make sure that the vent is clear.
  • Occasionally inspect outside the vent hood and remove any built-up lint.
  • Leave the door of the washing machine open when not in use to allow water left inside to dry. This prevents mold and bacteria from growing inside.
  • Ensure that water from the washing machine flows straight into the laundry sink or drain without splashing or dripping outside the laundry sink. You can use pipe extensions to prevent splashing.
  • Clear the port of your laundry of any obstacles like tint and other openings that may cause air leakage.
  • Dry the surroundings of the area as soon as possible by allowing air and natural light to go inside.
  • Check hoses and connections for leaks.
  1. Bathroom
  • Set up area rugs to help absorb moisture, but make sure to remove and clean them regularly when they get too wet.
  • Use an exhaust fan to remove moisture when you shower or take a bath.
  • Regularly check the exhaust fan to ensure adequate air movement and that it is vented to the outside and not to the attic.
  • Dry walls around the shower and bathtub after showering or bathing.
  • Avoid leaving damp towels on the ground; allowing them to dry naturally.
  • Check bathtubs and basins for any leaks; repairing plumbing leaks promptly.
  • Place mini-plants in the bathroom to help absorb moisture.
  • Remove any mold growths by scrubbing with unscented dishwashing detergent and water.
  • Clean frequently to stop small patches of mold from becoming larger.
  • Replace or repair open, damaged or cracked tile, grout, and caulking around tubs and showers.
  1. Windows, window frames, and sills
  • Repair any leaks promptly.
  • Use a kitchen range hood and bathroom exhaust fans to reduce indoor moisture levels.
  • Keep window coverings open to allow air to move over the windows.
  • Keep heating vents or baseboards clear of furniture so that heat can flow.
  • Leave interior doors open for good heat and air flow.
  • Dry window frames and sills daily to stop water from dripping and triggering mold growth.
  • Unplug and remove humidifiers.
  1. Walls
  • Scrub the wall hard enough to remove existing black, white or blue mold patches. Use bleach and heavy-duty sponge or scrub brush, allow the solution to soak for 5 minutes.
  • Use a big fan to enable the wall dry thoroughly.
  1. Wooden materials
  • Vacuum all mold affected areas to eliminate loose spores.
  • Use warm water and soap to wipe clean affected areas; and use a dash of vinegar to soften the mold.
  • Sand the cleaned area to eliminate any residual mold.

Trustworthy, timely mold remediation

There will be mold spores around your house, but they can not grow without moisture. That is why at West Central Equipment and Remediation we encourage homeowners to keep humidity levels in their homes between 40-percent and 60-percent to prevent moisture and mold problems.

For those already struggling with persistent mold, we recommend in-depth and systematic mold remediation to remove the existing growths and fix the underlying dampness.  As a professional service offering 24/7 all-year mold remediation, we have the right equipment and expertise to detect and solve all possible causes of moisture and mold problems in your home.

 For more ideas and direct support on how to prevent, clean and restore your home after mold invasion, visit the site “West Central Equipment and Restoration.”

How to clean up after a fire in your home

After a fire in your home has been extinguished by firefighters, the process of restoration begins. But before you can do anything inside or around it, make sure the home is structurally safe. Remember, fire can cause both obvious and hidden damages in electrical wiring, wall supports, foundation, deck, roof, porch or entrance. 

Call a professional fire damage restoration service to assess the safety of the entire structure before you begin cleaning. Also, if the damage is big consider letting professionals clean it up as they have the experience and the right cleaning tools for the job.

So how do you clean up after a fire in your home?

  1. Beware of burned debris and ash

Your home may be structurally sound, but may not be chemically safe due to the burned debris and ash left behind after the fire. Burned debris and ash tend to contain harsh chemicals with potential to damage your lungs, skin or eyes.

For instance, if the chemicals in the ash land on your skin, they may cause a burn, rash, or skin irritation.  Also, if the chemicals come into contact with your eyes, they can cause eye damage. Plus, when inhaled, the chemicals may irritate and damage the lungs.

So protect yourself before you begin handling the ash and debris.  Wear long pants, long sleeves, protective shoes with closed toes, and an N95 mask. Equally, have your hands covered with thick gloves. 

Open all the doors and windows to allow in air. Enough inflow of air will dilute and clear some of the harsh chemicals and lingering smoke. And as you clean up the damage, take short breaks to help you get out to the open air.

  1.  Clean up the damage in a stepwise manner

Following fire damage, generally the entire home will be in such a state that it’s extremely difficult to clean it up. It is advisable to perform the cleaning in a stepwise manner for better efficiency.

So begin by removing all the debris and ash. After that, remove any standing water. Then, replace or repair areas with signs of water damage.  

Next begin removing soot and smoke particles from all the areas of the home. This includes clearing vents to get rid of any soot and smoke particles. It also involves a thorough cleaning of the HVAC system to make sure it doesn’t spread soot or smoke particles to other areas of your home.

You will then need to determine items to keep and those to dispose of. All clothing and household items that are burned or damaged beyond repair should be cleared. Of course, this can be an emotionally difficult step but necessary. Try and keep in mind that most of these items are replaceable. 

Finally, eliminate the smoky aroma and purify the air to improve air quality throughout your home.

  1. Cleaning interior surfaces

Begin interior cleaning by first inspecting various surfaces. As you complete the inspection, remove debris, trash and all undamaged items you intend to keep.  This will give you a clearer view of the floors, walls, and ceiling, and enable you to determine the extent of the damage.  

If there is standing water, remove it before you can clean the surfaces. You can suck up all the standing water into a vacuum and deposit it outside the house away from the foundation. But you can also elect to use a bucket or other container especially if there is only a small amount of water.

As with the water, you should actively remove all loose soot and other debris from the surfaces. Use a large shop vacuum to achieve this step. If there is any mold growth caused perhaps by the water used to put out the fire, contact a professional mold removal service to help with assessment and possibly the cleanup. 

Next you can begin cleaning the surfaces. Start by wiping them with a bleach solution to prevent potential mold and mildew growth. A mixture of 1 cup bleach with 1 gallon of water will effectively clean the surfaces without discoloration.  An alternative is to apply a homemade mixture of trisodium phosphate, bleach and warm water. These solutions work well for most hard and flat surfaces. 

To clean walls, floors and ceilings and remove soot and smoke, deploy a mixture of trisodium phosphate, bleach, and water. For this purpose, mix 6 teaspoonfuls of tri-sodium phosphate, 1 cup of chlorine bleach, and 1 gallon of warm water.  Then, put on rubber gloves before you begin using the prepared solution to wipe these surfaces.  

Begin at the floor, move to the walls, and work your way up to the ceiling, going one small section at a time. Avoid dumping water over large areas at a time and use small amounts of cleaning solution on limited areas. This will prevent mold and mildew growth. Rinse every small area with warm water immediately after cleaning.

Next, allow the cleaned areas to dry. You can use large fans and also open the windows to hasten the process.  Remember, the walls, floors and ceilings should dry faster to avoid mold and mildew growth. 

Also, if these steps are unsuccessful, avoid using harsher solutions if you don’t achieve the results you desire. Instead, contact a professional service to help achieve better results or to handle a more substantial damage of the walls or hard-flooring.

  1. Dealing with smoke and soot in salvageable items

Some furniture, clothes and home accessories that are only slightly damaged may have residual smoke and soot. If you want to salvage those items, quickly clean them of the smoke and soot.

For upholstered furniture that is saturated with water, save the wooden frame by stripping off the fabric and padding to prevent growth of mold and mildew. Then clean both the hidden and exposed components of the furniture with appropriate solutions.

If you intend to throw furniture and other items into a washer, have a professional cleaner tackle the stains and smoke odors. Ensure that only clothes labeled as dry clean are taken to the dry cleaner and that they are treated to remove smoke odors as part of their cleaning process. 

For soot-stained washable fabrics, follow the washing recommendations on the label. Ideally, these items should be cleaned using oxygen-based bleach and a heavy-duty detergent. And if some stains still remain after washing, mix a fresh solution of oxygen bleach with warm water and allow the items to soak for at least 4 hours or overnight before you rewash.

If there are washable items that are not soot-stained but smell smoky, you can wash them as usual though adding 1 cup of baking soda to the final rinse cycle. And if the smoky smell persists, fill the washer with water and 2 cups of baking soda, allow the items to soak overnight, and rewash as usual.

For leather shoes, clothes, and various accessories, wipe them down with a damp cloth soaked in plain water. Then blot dry. Allow all the leather items to dry, but away from direct sunlight and heat sources. Once dried, clean with a saddle cloth and apply a leather conditioner to restore their supple finish. For best results, secure the services of a professional cleaner to help you with leather and suede coats. 

Place papers and books that have a smoky smell in a large, sealable plastic container. Add a powdered odor eliminator and seal the container for at least 48 hours. Next, remove the books, smell them, and assess if the odor has been successfully removed. If the odor persists, reseal for a few more days.

  1. Cleaning the exterior of your home

Clean the exterior surfaces using a power washer. Alternatively, you can use a stiff brush with a mixture of water and borax or other safe cleaning solution. 

But as much as possible, avoid cleaning the exterior by hand as it would require a substantial amount of time. So instead consider renting a power washer or hire a professional if cleaning a large area.

After power washing, clean the porch, deck, gutters, driveway, sidewalks and windows. These surfaces tend to collect dust and other debris during a fire. A power washer will help you clean the areas well, but again you can complete the cleaning faster and more thoroughly by hiring a team of professional cleaners.

  1. Disposing must-toss items

After fire damage, there are often items that simply must be tossed because there is more damage than immediately noticed or there may be more extensive contamination. 

Generally, the 7 items that should be thrown out after a fire in your home are electrical equipment, burned clothes, large textiles, furniture and mattresses, cosmetics and toiletries, medicine, and food items.

Small electrical appliances, entertainment equipment, and other electrical devices must never be used after a fire before they are checked for heat and water damage. In fact, when not sure about their condition, it is advisable to toss them as re-using such items carries the risk of starting another fire.

It is not advisable to clean and wear burned clothes. The smoke and soot chemicals in them may irritate your skin. You may also inhale harmful chemicals into your respiratory system. Plus, they may carry the smell of chemicals used by firefighters, which may be harmful. 

Apart from clothes, larger textiles like rugs, bedding, drapes, and carpet tend to absorb smells and chemicals of smoke, soot, and firefighting chemicals. And because they are too large to clean effectively when burned or compromised, consider throwing them out if practical.

The potency of medicines can be affected by the heat, water, soot, smoke, and chemicals present in your home during a fire. So, check with your doctor but more generally throw away medicines and buy new over-the-counter drugs or request your doctor prescribe a refill.

Throw away all the food in your home during the fire, even non-perishable food as they will be compromised by the fire. Some food, like canned and sealed foods, may appear okay after a fire, but the heat from the flames will still activate bacterial growth. Likewise, water and chemicals used to extinguish fire can contaminate food. 

You must throw away food in open containers, rusting or bulging cans, charred food, food with fire extinguisher dust on them, and perishable food left at room temperature for too long. Also, throw away anything you suspect is contaminated and any food stored in permeable packaging like cloth, cardboard, or thin plastic bags.

Dependable, efficient fire damage clean up services

After a fire in your home, the subsequent clean up can be an emotional and stressful undertaking. That is why you need the help of professionals to manage the situation more safely and efficiently.

At West Central Equipment and Restoration, we offer emergency fire damage clean up services in Lecanto, Florida. We arrive quickly, help with safety inspections and cataloging of losses, and proceed to conduct a methodical and efficient cleanup.

You can trust us to provide sound advice throughout the process and to handle your home with utmost care. For more information on fire damage restoration, visit the site “West Central Equipment and Restoration.”

What To Do After a Fire: A Homeowner’s Guide

A house fire can turn things upside down pretty fast. It is an emotionally terrifying experience, it can wreck untold damage to your home and possessions, and it can have a lasting psychological impact. But as with every other setback, taking the right, quick steps prevents further damage and allows for restoration of your property to its original, livable condition.

So what should you do after a fire?

  1. Contact your homeowner insurance provider

Soon after the fire has been extinguished, you should call your insurance company to get a claim number, the day and time when a claims adjuster will visit your property, and the permission to go ahead to begin emergency mitigation and remediation.

 Also, during the call, report about the fire incident and find out what will be needed to file a successful claim. The insurer may even provide you with resources to help you tackle the fire damage as they deal with fires often.

 Similarly, inform them you intend to document items damaged or lost in the fire for later reimbursement. Of course, an adjuster may have to personally inspect the damage before you can proceed, but photos are usually satisfactory in minor fires.

  1. Call a professional fire damage restoration company

Restoration professionals will help you through the recovery process and suggest the best steps to take based on the severity of the fire. Having an expert early in the process will mitigate the damage, ensure thorough cleaning, and reduce the overall costs associated with the damage. 

Soon after arriving, the professionals will do initial cleanup of burnt possessions, including books, furniture, articles of clothing, and other prized items. This step is taken to de-clutter your home. It usually also includes sorting through the items, and determining what items to save and those damaged beyond repair.

Generally, items burnt or directly exposed to the fire will be tossed, including medications, food, household items, burnt clothing, burnt books and paper. This is usually a difficult and emotional thing as most of the items thrown away have personal significance.

  1. Document the damage

With the help of the fire damage restoration professionals, you should now take inventory of damaged items. This will enable you to have a clear picture of what you have lost in the fire and what you ought to claim. 

The inventoried list should include damaged items and their purchase price, brand, and serial number, and other information that can help determine the loss. 

Keep track of all the receipts for housing, meals, clothing, toiletries, and other out-of-the-ordinary expenses you may incur during this period. The insurance carrier may reimburse the expenses and will need the receipts for that.

You should also cancel or suspend subscriptions or utilities, such as water, cable, electricity, internet, and even mail if you’ll not be residing in the home during the restoration period. 

Usually, emergency responders shut off utilities during a fire. But if you need them back on, you should check with the fire department before doing so as electricity can reignite a fire.

  1. Deal with smoke and soot damage

The heat and flames are not the only elements in fire damage. Usually, the adverse effects of a fire will reach every crevice of your home in terms of invisible smoke odors and visible soot.

In fact, even if the fire has been contained in a single room, it will cause damage in rooms far away from the flames. That’s because smoke has a tendency to flow from one room to another and cause as much damage as the fire itself.

Since fire damage restoration professionals understand the adverse effects of smoke and soot, you need them as early as possible to assess and deal with the smoke and soot damage. You can trust them to tackle the acidic soot residue and soot-related damage on various surfaces with utmost efficiency.

  1. Secure the property

Though your insurance policy will cover fire-related damages, any further damages or losses that occur after the fire is put out will not be covered. 

Therefore, have your home secured from vandalism, theft, and inclement weather. Have all openings boarded up and lock and secure all outside doors that survived the fire.  If you’re leaving the property, make sure all valuables are removed.

Timely, efficient fire damage restoration

At West Central Equipment and Restoration, we are a premier fire disaster and restoration service based in Lecanto, Florida. We have a team of qualified and dedicated staff on call 24/7 to respond to your fire, smoke, soot, water, mold, and wind damage. 

And with over a decade of experience in the emergency restoration industry, you can trust us to restore your property to its pre-fire damage condition. For more information on fire damage restoration and other emergency remediation, visit the site “West Central Equipment and Restoration.”

Important reasons for professional mold removal

Mold can grow unnoticed in your home and become a potentially dangerous and highly frustrating problem. It can be hidden behind tiles, inside the walls, under suspended ceiling and in other hard-to-notice areas. 

The fungus spreads quickly, silently and easily through its lightweight spores. And as soon as it lands on an organic material or other favorable, moist surface, it germinates, grows and spreads. Hence, in no time, it will have contaminated a large area, caused unsightly patches, and damaged walls, floors, furniture, and fabric.

Because it spreads swiftly through tiny spores, you shouldn’t try to remove the mold yourself. You lack the skills, experience, and equipment to do so. And you can make the problem worse.

So, instead, you should get a professional mold remediation to do the job and stop mold from being a persistent and harmful problem. Not only do the experts have the right skills, equipment, experience, and know-how to tackle any form and scale of mold problem quickly and efficiently, but they have also mastered the ins and outs of mold remediation, making them better qualified to solve the problem.

What are the important reasons for professional mold removal?

  1. Helps to prevent more severe damages

Mold spreads fast and wrecks untold havoc when unchecked.  And because you may not have the right experience and equipment to detect every hidden growth, the fungi may continue spreading and causing damage without you realizing.  

In fact, the mold can gradually eat various materials in your home and eventually cause irredeemable and costly structural problems.

Involving professionals in mold detection and removal as early as possible ensures all existing growths are promptly discovered and removed. Also, expert knowledge is necessary when dealing with severe mold to prevent the fungi from making your home uninhabitable.

  1. Guarantee good health for inhabitants

Long term exposure to mold causes some symptoms, whether you are allergic to them or not. For instance, you or other inhabitants may experience nasal congestion, sneezing, runny nose, or skin rash.  

And those with asthma or allergies may experience more severe reactions, like asthma attacks, shortness of breath, constant headaches, migraine, or brain fog. 

Proper, efficient cleaning up of existing mold growths will prevent associated health risks. But trying to do so on your own may result in the release of thousands of mold spores into the air, exposing your loved ones to the risk of ingesting spores and developing health problems. 

Professional mold remediation will not just remove the mold lurking on the walls, floors, and ceiling, but will also do so in a manner that protects you and your loved ones.

  1. Identify the source of the mold problem

Removing mold is an excellent step. But no matter how often or how hard you try, the mold will keep growing if the underlying problems are not tackled. To germinate, grow and flourish, mold needs water, nutrients, oxygen, and an ideal environment. So these conditions must be cut off in order to get rid of the fungi permanently.

Professionals understand this approach. So they focus on both removing the mold and identifying the source of the growth before they even start the remediation process. 

You can count on a professional mold remediation service to determine the severity of the problem and take the right action to eliminate the mold issue once and for all. Plus, the specialists have the tools, knowledge, and experience to get the job done swiftly and more efficiently.

  1. Saves money

This may not be very obvious, but it is true. While hiring professionals can appear a little expensive, it is economical in the long run. 

That’s because recurrent mold growths can cost you an average of $500 to $5,000 per year. And in some cases, much more expensive especially if there is need to repair widespread structural damage.

By having professionals do the job, the problem is tackled promptly and comprehensively, eliminating issues that may trigger complications requiring thousands of dollars to repair. 

For instance, the experts will do an efficient job that will prevent mold from eating through building materials, such as ceiling tiles, floorboards, carpet, wallpaper, and drywall.

Why hire West Central Equipment and Restoration?

At West Central, we have mold remediation specialists who know how to inspect your property for mold, the mistakes to avoid, signs not to overlook, and how to permanently solve the problem.

Our professionals will:

  1. Locate and eliminate the source of mold, such as leakage or moist materials.
  2. Discover all mold growths in your property, whether hidden, visible, or dormant spores.
  3. Use proper equipment to speedily and efficiently remove mold from wood, clothes, walls, and other areas.
  4. Replace affected materials and apply special products to restrain mold development, hence preventing future mold growth.
  5. Repair any damages and thoroughly clean contaminated spaces.
  6. Work quickly and efficiently to minimize possible inconveniences to you and other inhabitants as restoration is completed.

At West Central Equipment and Restoration, we are committed to using safe, effective mold removal techniques. We are also continuously refining our mold detection and remediation methods to help us serve our clients better.  For more information on mold prevention, detection and removal, visit the site “West Central Equipment and Restoration.”

7 Steps to Take Immediately After Water Damage

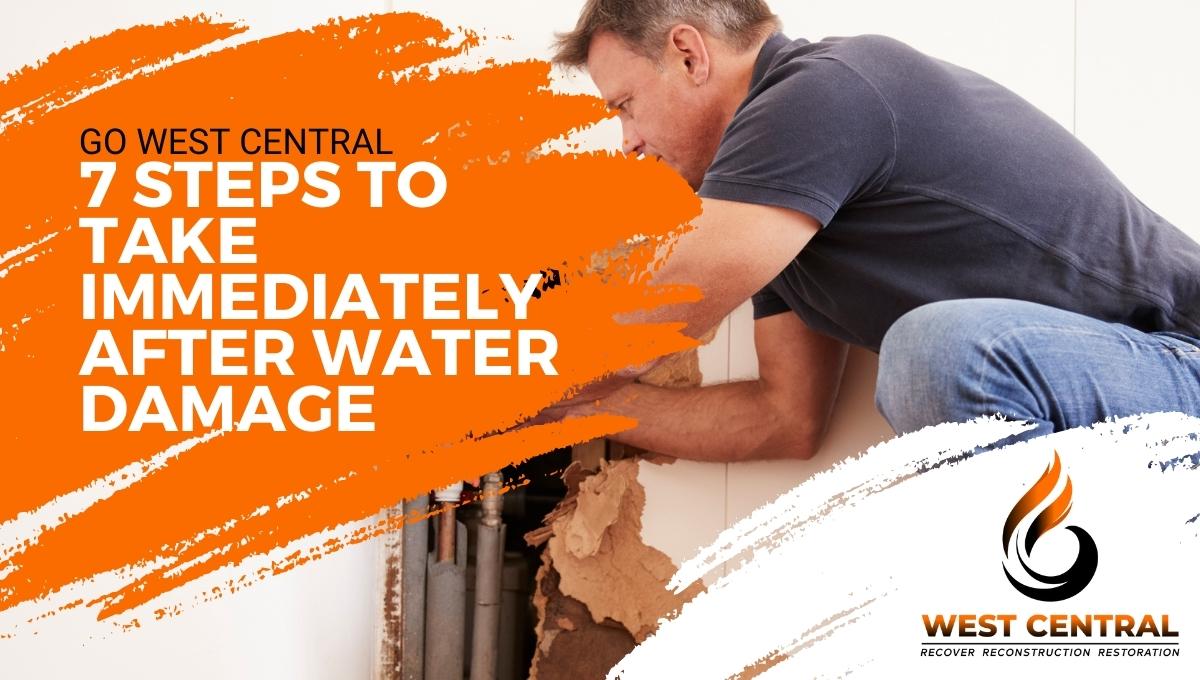
When water damage arises in your property, you need to have the water removed and the property restored as soon as possible.  No matter the cause of the damage—a leaking appliance, broken pipe, a fire, or flooding—the longer the water sits in your property the more potentially serious and expensive the problem can be.

For instance, allowing the water to sit in the premises for a few hours can result in saturation of walls and ceiling, and in all manner of structural damage and safety hazards. And when the water sits in your home for more than 24 hours, it can allow mold to grow.

So after water damage, it’s best to act quickly. If possible, you need to identify the source of the water and cut off further inflow into your property. And when it is a massive damage, it’s essential to contact a professional water damage restoration service immediately. 

What are the 7 steps to take immediately after water damage?

  1. Call your insurance company

If your property is covered by homeowner insurance, then the first step should be to call your insurance provider. During the call, you’ll learn whether your insurance policy covers the kind of damage that has occurred.

Your insurance provider will explain what is covered by the policy. Then an adjuster will be dispatched to your property to come assess the damage and evaluate your possible claim. Your insurance provider will also give you the go ahead to undertake cleanup.

  1. Document the damage

After speaking with your insurance provider, you need to make a comprehensive documentation of the damages. 

Take photos of the nature and degree of the damage. Record videos of the level of water, the rooms affected, and the items destroyed.  Create lists of items involved and the extent of the damages.

You will then discuss your documents with the adjuster. And after that, you’ll need to keep them for the subsequent claims process.

  1. Take the necessary safety measures

Depending on the degree of the damage, your home may be unsafe. For example, if the water damage is caused by flooding, it may destroy the structure of your home and render it unsafe. In such a case, leave your home while professionals assess the property for occupational safety.

If your property has faced a mild-to-moderate water damage, you may stick around. But you must still take safety precautions as you work to prevent further damage. For example, you must switch off the main source of power to your home—water and electricity do not mix. Avoid moving into flooded areas before you turn off electricity.

Generally it’s best to wear protective clothing, such as gloves and rubber boots before you move items from the flood or just re-enter your flooded premises. This will protect you from injury and potential infection, particularly if the water is contaminated.

  1. Remove the water

As soon as your insurer authorizes damage restoration, start removing the water. Generally, water should not be allowed to sit in the property for more than 8 hours. And when circumstances are difficult, effort should be made to extract it within 24 hours.

Wearing protective gear, remove the water using plastic tubs or buckets. Also, make sure to remove water from furniture, under carpets, floors, walls, mattresses, and other items that might have soaked up the water.

After removing excess water, turn your attention to water absorbed by items or hidden in hard-to-access areas. Using a mop, absorb the remaining pockets of water. Remove and air-dry mattresses, cushions, curtains, pillows, and other items that might have soaked in water.

Besides, if your property is flooded by an overwhelming amount of water, you need to have it extracted and cleaned up by a professional water damage restoration service. Call a reputable provider as soon as possible to help with that.

  1. Dry out affected areas

The next step after water extraction is drying all the affected areas and items. So with all the standing water removed, switch on a dehumidifier, air conditioner, or fan to help remove moisture and dry out your home. 

Floor fans and air movers are effective in drying damp areas. But you can also use a wet-dry vacuum to finish the drying process or when there is not much standing water.  As you dry affected areas, drag away items such as rugs and cushions from the scene to allow the areas to ventilate and dry properly within 24 hours.

  1. Check and clean mold growth

If by any circumstances the water stays in your property for more than 24 hours, it can potentially cause mold growth.  Mold tends to grow when water sits in a property for a day or two after a flood in areas such as the basement, closet, and showers.

Should you find mold, you can use typical cleaning agents, such as soap and bleach, to address the mold issue. But you should understand that this is only a preliminary measure that may not eliminate the mold completely.  So if there is a significant mold problem, then you should reach out to a professional mold restoration service, especially if the affected areas are more than 6 square feet.

When cleaning up mold from any affected areas, avoid spreading mold spores elsewhere in your home.

  1. Complete the necessary repairs

With the water removed, affected areas dried and mold checked it is now time to complete restoring your property by repairing damaged areas. For repairs, you should hire a professional to make sure that they are done right the first time.

Generally, after water damage, you may need to replace your drywalls, remediate mold damages, replace basement wall panels and flooring, and restore any new laminate flooring. A professional will conduct a detailed inspection of your property, recommend what to repair and how to conduct the repairs, and go ahead with the repairs.

After the repairs and restoration work, your home will be back to a livable condition.  If you engaged a professional restoration service, they will give you the go ahead once your home is restored. But if the restoration is done after a natural disaster, you may need the approval of the local government before you can move back in.

Are you looking for a reputable, effective water damage restoration service in Lecanto, Florida? Get in touch with West Central Equipment and Restoration to help you deal with the damage. 

At West Central Equipment and Restoration, we have a team of knowledgeable, experienced technicians who will help resolve the damages as quickly as possible. We provide 24/7 emergency water damage restoration service and arrive at your home or business premises fast !! 

For more information on water damage restoration services, visit the site “West Central Equipment and Restoration.”

Mold: The Importance of Proper Ventilation

Like all fungi, mold requires a favorable environment to grow and thrive. Generally, molds are part of the natural environment, being useful in helping to break down dead organic matter, such as fallen leaves and dead trees. 

Mold spreads and grows through tiny, invisible spores that float in air. Upon landing on wet or moist surfaces, the spores germinate and produce mold colonies. Such growths are often helpful when they occur outdoors, but when they happen indoors, they are not useful and tend to have adverse effects on the health and comfort of the occupants.

Importance of proper ventilation in preventing mold growth

When properly designed, installed, maintained and operated, ventilation systems help to control the inflow and circulation of air indoors.  A proper ventilation system brings in new, fresh air indoors and ensures the air circulates in the home. 

The constant circulation of air indoors enhances indoor air quality by removing particulates, odors and other airborne contaminants, such as mold spores.  A correctly designed ventilation system also prevents entry of harmful substances and contaminants, including mold spores, which can degrade indoor air quality.

Therefore, with proper ventilation, the number of indoor mold spores can be reduced by preventing their entry or removing them from the interior of the home. Appropriate ventilation also changes pressure differences across a building, which may cause or prevent infiltration of mold spores from building structures or adjacent spaces. 

In fact, through proper ventilation the concentration of the spores in various sections of the home can be diluted to the point that they do not germinate even when the conditions become somewhat favorable.

Regulating indoor moisture levels through proper ventilation

A home’s ventilation system affects moisture flow through the building. It also helps to control humidity and may under various circumstances result in very high or very low humidity. 

For example, areas with poor ventilation usually tend to have increased humidity, which in turn results in condensation. On the contrary, areas with proper ventilation are usually more likely to have appropriate moisture levels as excess moisture is promptly removed by air flow.

In many homes, an elevated relative humidity is typically caused by poor ventilation. That’s because poor ventilation allows for the buildup of excessive moisture on surfaces. With increased relative humidity comes condensation and eventually mold growth.

Condensation occurs when humid air is in direct contact with a cold surface. That is, the high level of relative humidity involves an elevated amount of water molecules, which upon hitting a cold surface condenses into liquid.

A relative humidity above 60-percent increases the risk of mold because it can produce wet surfaces that mold spores need to germinate and spread. Plus, the surfaces where condensation may occur tend to have the nutrients that mold needs to thrive.

Therefore, having proper ventilation systems is an effective way of preventing mold. Adequate ventilation lowers relative humidity, prevents accumulation of moisture via condensation, and hence eliminates conditions that feed mold growth.

Trustworthy, professional mold remediation

Have you been struggling with persistent mold growths in your home? Would you like a thorough inspection of your property to unearth all the ventilation and moisture issues that are behind the mold growths?

At West Central Equipment and Restoration, we are a reputable, reliable and competent mold remediation service that provides top-notch, timely inspections, cleanup, and restoration of mold-ravaged homes. 

We work with homeowners to ensure proper design, installation, and maintenance of efficient ventilation systems. Plus, we respond to flood emergencies to help with water removal and flood cleanup, which prevent potential growth of mold.

During inspections, we dig out causes of poor ventilation, including:

  1. Inadequate exterior vents in the building
  2. Obstruction of exterior vents of the building by gradual buildup of debris
  3. Inadequate interior HVAC vents
  4. Obstruction of interior HVAC vents by furniture and other items

We also look out for signs of poor ventilation, such as:

  1. Presence of mold in your home
  2. Frosted appearance of glass windows and shower doors
  3. Appearance of rust staining on metal pipes
  4. Noticeable temperature differences between various rooms (hot or cold spots)

When we detect ventilation problems in your property, we fix the issues or update the ventilation system to make it effective in preventing entry of pollutants and removing indoor contaminants. Eventually, we ensure that your updated ventilation system can keep moisture out and away, control indoor humidity levels, and prevent recurring mold issues.

If during an inspection we find mold growth in your home, we remove it safely and effectively using the right techniques and cleaning solutions. You can trust us to deliver a mold remediation service that protects your health and enhances your home’s indoor comfort at a competitive price.

For more information on mold growth prevention, removal and restoration, visit the site “West Central Equipment and Restoration.”

Water Damage Repair: What to Expect When You Call a Professional

Water damage can occur unexpectedly and with catastrophic results. Your property can experience water damage due to a plumbing problem, an overflowing bath, or flooding due to bad weather. And when not addressed swiftly, the water can flood the floors, wet the drywall, soak furniture, stain walls and items, and cause electrical damage. 

When the water is left to sit for more than 8 hours, it can cause structural damage, such as cracks in the walls or foundation of the building. It can also trigger the growth of mold and mildew, cause unpleasant odor, raise repair costs, and increase the risk of health problems, like asthma

That is why it is important to call a professional water damage restoration service to help you handle the problem as soon as it occurs.

So what can you expect from a water damage repair professional?

  1. Respond quickly

Reputable water damage remediation professionals typically have a standby 24/7 emergency response. You won’t surprise or burden them by making that distress call. In fact, the best technicians will arrive at your property within hours of your call.

A swift response will help prevent further damage, including swelling, splitting, and staining of walls, floors, and items. Also, a speedy response will help salvage precious items, which can be removed from the affected areas, cleaned and restored quickly, helping to mitigate losses. 

Critically, the technicians will remove the water quickly and prevent potential growth of mold and mildew.

At West Central Equipment and Restoration, we run and operate an emergency water damage restoration service that emphasizes quality and rapid response.

 When you call us, we’ll ask you a few quick questions about the damage, source of the damage, condition of the premises, insurance information, condition of electrical circuits within the premises, and availability of electricity around the premises. Generally, we’ll then prepare for the restoration and leave for your premises, arriving within 30 minutes to 1 hour.

  1. Evaluate the damage carefully

A professional restoration service will assess the damage objectively and with a critical eye, unearthing issues that may be difficult to see such as unapparent mold growth. This prevents major problems later on.

When technicians from West Central Equipment and Restoration arrive at your property, you should expect them to conduct a detailed inspection. The inspection helps to identify the source of the water and to stop more water from rushing in.

The technicians will also identify the type of water (category 1, 2 or 3) and check if it is contaminated. Also, they will assess the damage, develop solutions, assess the safety of the property, and debrief everyone involved.

  1. Protect your valuable items

Water damage technicians know their job and will carry it out carefully to minimize potential damage to various items. So upon arrival, they will quickly take steps to protect the property and facilitate the entire recovery process, such as moving furniture and other property and cordoning off unaffected property. 

Expect the professionals to take steps, such as boarding up, roof tarping, and blocking or moving contents, property and furniture. These steps will prevent exposure to chemicals that may be harmful, minimize contact with bacteria from contaminated water, prevent exposure to mold spores that can trigger respiratory problems, and limit contact with compromised electrical systems that may lead to electrical shock.

  1. Extract and remove excess water

A critical step in water damage remediation is removal of the excess water. In fact, one of the major reasons for working with professionals is their ability to remove excess water quickly and safely to minimize damage to your property.

Expect quality professional remediation services to use powerful equipment such as submersible pumps and industrial-grade extractors to remove the water. The water removal steps used will be methodical and scrupulous to ensure reduced drying time, minimize primary water damage, prevent mold growth, and curb secondary water damage.

After visible excess water is removed, some water will be left hidden within porous materials like wood, drywall and hard-to-access areas within the premises.  The professionals will use industrial-grade dryers, blowers, dehumidifiers to remove left-over water and reach an acceptable level of dryness.

  1. Dry affected areas quickly and efficiently

Expect a professional service to come with the right equipment that will help to dry the affected areas swiftly and effectively. This will ensure that water does not sit longer in the building to cause worse structural damage or mold growth. By manipulating temperature and relative humidity, the professionals will ensure the premises are completely rid of unwanted water and moisture.

  1. Dispose and restore various items

When the premises are dry, water damage restoration technicians will clean the walls, floors, and other surfaces using a method that is suitable and safe for their surface condition, the kind of water contamination, and extent of water damage.

Then, using special drying techniques, such as drying chambers, they will restore valuable items like documents and fine art, furniture and furnishings, electronic equipment, computers and machinery, and flooring.

But for items that are too damaged to recover or restore, the technicians will dispose of them in a safe and efficient manner. 

  1. Deodorize and sanitize the property

Depending on the type of water your premises have been exposed to, you can expect a serious, persistent, and difficult-to-remove odor to emerge. Therefore, the technicians will prioritize removal of unpleasant odors by deploying special techniques, scrubbers, and fogging.

And to enhance the safety and good health of the occupants, the water damaged property and items are sanitized.  The entire premise is treated with a disinfectant to kill pathogenic organisms, such as bacteria, viruses, fungi, mold, allergens, and other bio-contaminants

  1. Carry out repairs and restore the property

Once they are satisfied with the work done so far, the technicians will conduct further testing and monitoring of all the affected areas. You’ll also be asked to review the work completed.

And lastly, the technicians will conduct the necessary repairs to restore the property to its pre-damage condition.  For example, they can remove the damaged drywall and replace it with a new one. 

Restoration services can also include repainting the walls, rebuilding and reconstructing damaged areas as well as carrying out restorative carpet cleaning and even removing the old and installing a new tile, wooden or marble floors. 

Water damage can be tragic when response is not immediate and effective. Having your property restored by skilled, experienced technicians will save you money, limit additional damage, and prevent long-term problems since when done right the first time.

For more information on water damage restoration services in Lecanto, Florida, visit the site “West Central Equipment and Restoration.”

Black mold exposure: Symptoms, treatment, and prevention

Mold is a fungal growth that germinates from spores that land on damp or decaying organic matter.  There are many different species of mold that come in diverse colors, but black mold is often considered the most dangerous.

Black mold (Stachybotrys chartarum), also called toxic mold, is a common type of mold that has a dark green or black appearance. It grows on wood, cotton, and paper products, and produces toxic chemicals within its airborne spores and fungus fragments.

These toxic chemicals, called mycotoxins, are dangerous if eaten. And though there is no link between inhalation of Stachybotrys chartarum mycotoxins and deadly fungal disease, the mycotoxins cause health problems when inhaled by people with asthma, allergies and hypersensitivities.  Nevertheless, production of mycotoxins is not limited to black mold. Most mold growths produce mycotoxins regardless of their color.

Symptoms of black mold exposure

Black mold causes symptoms in people with asthma, allergies or hypersensitivities. They also cause symptoms in older adults, infants and children, and people with weakened immune systems. Plus, prolonged exposure to black mold can cause symptoms in healthy people.

The most common symptoms of black mold exposure include:

  1. Sneezing
  2. Coughing
  3. Postnasal drip
  4. Itchy eyes, throat, or nose
  5. Nasal congestion
  6. Dry, scaly skin

When you have allergy, you’re more sensitive to mold exposure. Hence, black mold exposure can trigger an allergic reaction, producing symptoms such as:

  1. Watery, red eyes
  2. A runny or blocked nose
  3. Skin rashes
  4. Dry cough
  5. Wheezing
  6. Sinusitis

In some cases, though rarely, allergic reactions due to mold exposure can present severe symptoms, including hypersensitivity pneumonitis. 

Symptoms of chronic hypersensitivity pneumonitis include:

  1. Tiredness
  2. Shortness of breath
  3. Progressive weight loss
  4. Coughing that lasts weeks or months

Besides, exposure to black mold can trigger asthmatic attack. It can also worsen asthma and lung problems if you have a pre-existing lung condition. 

Symptoms of mold induced asthma attack include:

  1. Shortness of breath
  2. Wheezing
  3. Chest tightness
  4. Coughing

In people with weakened immunity, such as due to HIV, and in those who have undergone cancer treatment or organ transplant, exposure to black mold can cause fungal infections. This contrasts with those with healthy immune systems where mold exposure does not lead to infection.

Diagnosis of black mold exposure

There are no specific tests for diagnosis of health problems caused by mold exposure. So your doctor will rely on your symptoms, medical history, and family history to make the diagnosis.

When necessary, your doctor may order for some tests. For instance, a skin prick test may be performed to check how your skin reacts to common allergens. 

Likewise, blood tests can be requested to help determine how your immunity responds to mold exposure and whether you are allergic to specific types of mold.

Treatment of black mold exposure

When your doctor is certain that your symptoms are due to mold exposure, you will be treated in the same way allergic reactions to other airborne allergens are treated. For example, your doctor may prescribe antihistamines, such as cetirizine or loratadine, to reduce your immune system’s response to the mold and minimize airway inflammation. 

You may also be given a decongestant, such as pseudoephedrine, to help reduce swelling due to allergic reactions. Plus, depending on the affected area, your doctor may recommend using eye drops, steroid nasal sprays, antihistamine nasal sprays, or immunotherapy.

Prevention of black mold growth

Since mold thrives in humid and damp environments, monitoring humidity levels in your home is a great way to prevent the growth of black mold.  Ideally, humidity in your home should not exceed 50-percent throughout the day. You can ensure this by checking every few hours how the humidity level changes. You can also use a dehumidifier during humid months.

Installing an air conditioner with a high-efficiency particulate air (HEPA) filter will help you to remove mold spores from the air inside your home. Also, you can add mold inhibitors to paints to prevent mold growth on ceilings and walls.

Regularly inspecting your building for signs of water damage will help you to detect possible areas of mold growth. When there are areas of water leakage, fix them immediately and keep your home clean, dry, and well-ventilated. If there is flooding, deal with it quickly, drying out soft furnishings and promptly cleaning wet items with commercial products.

Clean your bathroom regularly. And use exhaust fans in the bathroom and kitchen or open windows to enhance ventilation. Avoid putting carpets in rooms that are likely to get wet, such as kitchen, bathrooms, and basement. 

Remove mold and mildew as soon as they appear.  Visible mold is removed from hard surfaces using a commercial mold removal product, hot soapy water, or a mixture of 1 cup of bleach per gallon of water. Never mix bleach with other cleaning products.

Trustworthy, efficient mold remediation

Are you tired of constantly having to remove mold from your home? Are you having respiratory problems due to mold exposure? Or are you struggling to contain a persistent moisture problem in your property?

At West Central Equipment and Restoration, we provide effective, reliable mold remediation services in Lecanto, Florida.  Our certified technicians have the requisite skills and experience to remove any type of mold growth quickly, safely, and effectively. 

During the process, we also address any moisture issues that may be behind the mold problem. Call us now for a professional mold inspection, removal and remediation. For more information on mold remediation throughout Florida, visit the site https://gowestcentral.com/

Is there always mold with water damage?

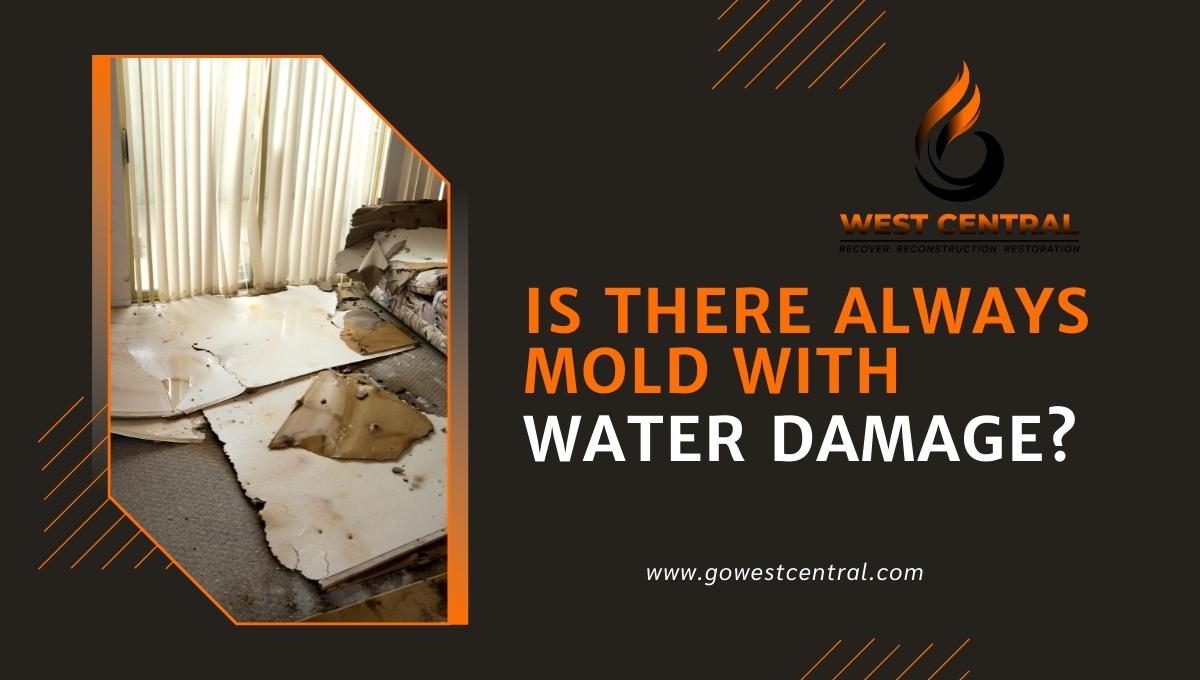
While mold is one of the most common consequences of water damage, not all cases of water damage can lead to mold. The growth of mold requires appropriate conditions. And often, water must settle in a home generally for more than 8 hours for mold growth to begin.

Mold finds its way into a property through airborne spores which then germinate in the presence of suitable conditions of temperature and humidity. Usually, if there are airborne spores in a home and dirty water settles in the home for more than 8 hours after a damage then mold has sufficient conditions to begin spreading. 

But if a water leakage occurs and is quickly cleaned and dried, mold growth is either fully prevented or massively slowed down. So the best way to ensure there is no mold in your home after water damage is to remove the water as soon as possible. 

At West Central Equipment and Restoration, we respond fast encouraging quick water extraction and complete drying of a property soon after water leakage or flooding. From our experience, we understand that swift action prevents damp conditions from existing for too long in your home, which minimizes the possibility of mold growth. 

Dangerous, rapidly growing fungus

Mold is a type of fungus that grows on moist surfaces, particularly organic-based surfaces. The fungus grows and spreads through microscopic spores and can cause immense property damage through the decomposition of wood surfaces and other organic components of the floors, ceilings, wallpapers, and carpets.

The growth of mold in a home can also result in significant health issues. For instance, mold can trigger or worsen the symptoms of asthma, allergies, and other respiratory illnesses. It can also lead to bothersome skin rashes, eye irritation and nasal congestion.

More concerning are certain types of mold that secrete mycotoxins which can cause lung and eye irritation, nausea, headaches and fatigue in those who are exposed to these fungi.

Spotting mold growth in your home

When there is mold in your home, they appear as white or black specks that are usually conspicuous and easily spotted. Also, mold is characterized by a unique, musty smell that makes it easier to identify. But mold may equally grow in hidden places, which makes it difficult to notice and often require thorough inspection to discover.

After water leakage in your home, significant mold growth may occur after 48 hours to 1 week, depending on how quickly the water is removed. So even after you remove water from your property, you should actively search and watch out for potential mold growth.

At West Central Equipment and Restoration, we encourage a proactive approach for mold prevention and eradication. So we strongly recommend that homeowners regularly check for signs of water leakage in their homes. And whenever they detect any leaking areas, quickly dry the affected.

Checking for water leakage and mold growth entails looking for:

  1. Sounds of water dripping or rushing
  2. Water stains on ceilings and walls
  3. Musty smells
  4. White or black specks on surfaces
  5. Sudden hikes in water bills
  6. Signs of mold near pools, water heaters, laundry rooms, parking areas, and areas located near water features

Preventing mold growth in your home

Taking measures to prevent mold is a critical remediation step after water damage. It involves eliminating damp conditions that may allow mold spores to germinate in your home following the damage.

To prevent mold growth, you should:

  1. Get rid of all the water leaked into your home as quickly as possible, in less than 8 hours.
  2. Carry out thorough inspection of any leaking areas and repair any plumbing issues.
  3. Improve aeration in your property, such as moving furniture away from the walls to encourage air circulation.
  4. Keep your kitchen, bathroom, and laundry areas completely dry by using exhaust fans.
  5. Vacuum your property regularly to prevent mold spores from germinating.
  6. Have a specialist inspect your property regularly for the risk of water damage and for conditions that can promote mold growth.

Timely, meticulous water and mold damage restoration

Are you struggling with a persistent mold problem in your home? At West Central Equipment and Restoration, we provide prompt, thorough water and mold damage remediation and restoration services. 

When you have water damage in your home, we arrive as soon as you call us, identify and fix the source of the water leakage, and remove all the water as quickly as possible. Then, we dry all the affected areas thoroughly to get rid of dampness on wood and other surfaces, eliminating conditions that can trigger mold growth. 

Get in touch with us today to find out how we can form a long-term partnership that will secure your home from water damage and mold problems. For more information on water damage and mold remediation, visit the site “West Central Equipment and Restoration.”